The idea of making a pudding has been on my mind for a long time. So, last Saturday I felt like it was the right day to try my first pudding recipe -- a super easy and marvellously tasty, as it has turned out to be, the APRICOT or PEACH PUDDING. I've tried both versions and the one with the juicy peaches came out even much better. Every bite was literally melting in the mouth...
I found it a bit puzzling for myself to clearly define what kind of dish the pudding really is. If you search for pudding recipes, it seems there are thousands of them, you'll see that they are all different - baked, steamed, boiled, creamy. Yet, all of them... pudding! There are even gelatine puddings which are specially popular in US and Canada. Puddings are not even always sweet, by the way!
So, let's just have in mind that pudding is both a multifaceted dessert and a savory as well. Ok, theory is interesting, but let's better move on to the yummy practice ツ
YOU WILL NEED:
peaches or apricots -- 6 pcs
butter -- 135g
flour -- 120g
sugar -- 180g + 3 tbsp
eggs -- 2 pcs
vanilla extract -- 1/2 tsp
LET's MAKE IT:
1. Cut the peaches into halves and remove the stones. Put the peaches in a pot, add 4 tbsp water, 3 tbsp sugar, vanilla extract. You might find it more convenient to simmer the peaches by portions.
2. Leave the peaches to simmer over slow fire until they become soft.
3. Now, preheat the oven to 150C.
4. Pound 125g of butter with 180g of sugar, add flour. Beat the eggs and add them into the dough. Mix it all very well.
5. Grease the baking mold with a small quantity of butter, lay out the peaches and pour the dough over.
6. Bake for ab. 30 min.
Showing posts with label ☕ ⓇⒺⒸⒾⓅⒺⓈ. Show all posts
Monday, August 29, 2016
Tuesday, March 29, 2016
Spring and a cake
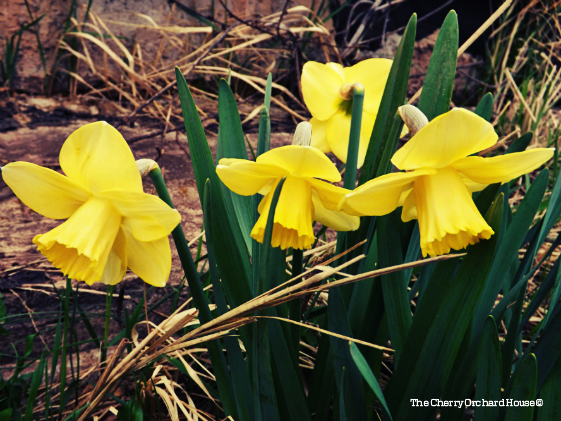
...while we're waiting for the spring flowers to appear, here's some narcissuses from my photo archives to communicate a happy Spring mood and make the waiting joyful!
“I sometimes think the Pussy-Willows grey
Are Angel Kittens who have lost their way,
And every Bulrush on the river bank
A Cat-Tail from some lovely Cat astray.” ― Oliver Herford, The Rubaiyat of a Persian Kitten
... after a little walk, it's time for a cake - a gypsy spring cake, Mazurek, that is also said to be traditionally made at Easter. Please don't judge by its humble look, the cake is, really, rich in taste and texture! And healthy too, because it's naturally sweetened by dried fruits themselves - raisins, figs and dates, with only a small amount of cane sugar. I added also Cornelian cherries for some sour and even a little salted taste.
AND, HERE's THE RECIPE: [adapted from the GYPSY FEAST by Carol Wilson]
✫ 5 middle-sized eggs, separated ✫ 1/2 cup unrefined milled golden cane sugar ✫1 tsp vanilla extract ✫ 50g chopped figs ✫ 50g chopped dates ✫ 50g large raisins ✫ peel of 1 orange, grated ✫ 3tbsp lemon peel, grated ✫ 50g Cornelian cherries ✫50g crushed walnuts ✫ 6 tbsp cornstarch (I used an oat flour this time, which also worked very well).
1. Combine finely chopped figs, dates,
Cornelian cherries, large raisins and walnuts with orange and lemon rind (grated) and cornstarch (or oat flour).
2. Preheat the oven to 160C. Beat the egg whites until they form soft peaks, then gradually add the sugar, whisking all the time until the meringue forms firm peaks. Fold in the lightly beaten yolks and vanilla.
3. Gently add the fruit mixture to the egg white mixture. Mix well, pour the dough into a baking pan. Bake for 30 minutes.
“I sometimes think the Pussy-Willows grey
Are Angel Kittens who have lost their way,
And every Bulrush on the river bank
A Cat-Tail from some lovely Cat astray.” ― Oliver Herford, The Rubaiyat of a Persian Kitten

... after a little walk, it's time for a cake - a gypsy spring cake, Mazurek, that is also said to be traditionally made at Easter. Please don't judge by its humble look, the cake is, really, rich in taste and texture! And healthy too, because it's naturally sweetened by dried fruits themselves - raisins, figs and dates, with only a small amount of cane sugar. I added also Cornelian cherries for some sour and even a little salted taste.
AND, HERE's THE RECIPE: [adapted from the GYPSY FEAST by Carol Wilson]
✫ 5 middle-sized eggs, separated ✫ 1/2 cup unrefined milled golden cane sugar ✫1 tsp vanilla extract ✫ 50g chopped figs ✫ 50g chopped dates ✫ 50g large raisins ✫ peel of 1 orange, grated ✫ 3tbsp lemon peel, grated ✫ 50g Cornelian cherries ✫50g crushed walnuts ✫ 6 tbsp cornstarch (I used an oat flour this time, which also worked very well).
METHOD OF COOKING:
2. Preheat the oven to 160C. Beat the egg whites until they form soft peaks, then gradually add the sugar, whisking all the time until the meringue forms firm peaks. Fold in the lightly beaten yolks and vanilla.
3. Gently add the fruit mixture to the egg white mixture. Mix well, pour the dough into a baking pan. Bake for 30 minutes.
Wednesday, February 10, 2016
Baked Apples with Honey + yummy winter tea
I rarely eat apples (well, just not my kind of fruit to eat it raw), but anything baked with apples is quite a different story! Apples, when baked, get so juicy and flavoursome! So, now here's a yummy idea of an apple breakfast I've recently done for myself:
1. Wash the apples and core them so that there was a hole for a filling.
2. The filling i made was a mixture of what's usually at hand - honey, raisins, cedar nuts or just any pounded nuts and, of course, spices e.g. cinnamon & nutmeg powder.
3. Pour some water onto the bottom of a deep pan, place there your stuffed apples. Cover with a lid and cook for 15-20 mins.
... I enjoyed my apples along with sunflower seed brittles (gosinachs) and halwa!
And the tea was very delicious - a mix of black tea with hibiscus, bits of beetroot, strawberry, raspberry & apples, flavoured with chocolate!
These were my first baked apples which I did without assistance, so, yeah... they came out collapsed. Still, that didn't affect the taste... and, I will continue practicing! ;)
1. Wash the apples and core them so that there was a hole for a filling.
2. The filling i made was a mixture of what's usually at hand - honey, raisins, cedar nuts or just any pounded nuts and, of course, spices e.g. cinnamon & nutmeg powder.
3. Pour some water onto the bottom of a deep pan, place there your stuffed apples. Cover with a lid and cook for 15-20 mins.
... I enjoyed my apples along with sunflower seed brittles (gosinachs) and halwa!
These were my first baked apples which I did without assistance, so, yeah... they came out collapsed. Still, that didn't affect the taste... and, I will continue practicing! ;)
Monday, July 6, 2015
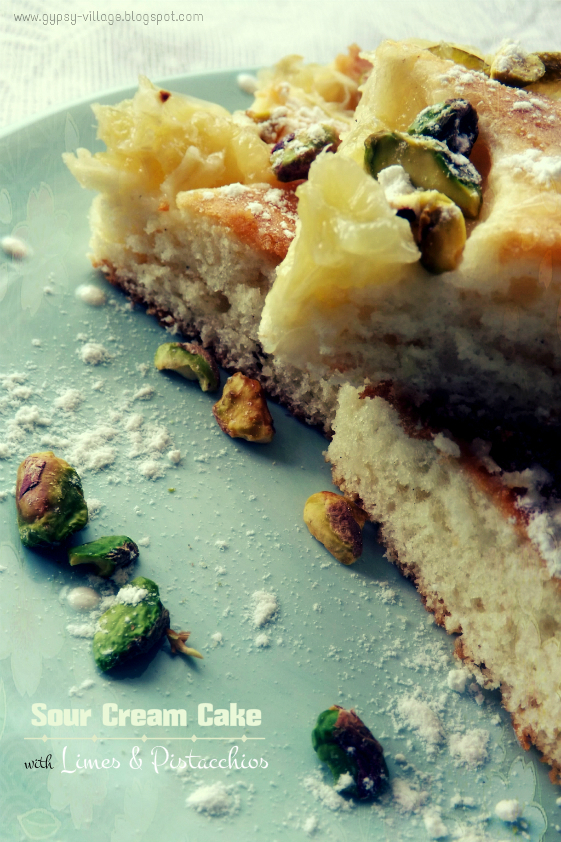
Lime & Pistacchios Sour Cream Cake
... would like to share this lovely recipe that is especially perfect on a hot summer day! This cake has a soft & light texture and is very juicy. Every bite seems like a citrus bomb blowing up inside your mouth! ... cups of hot chamomille tea make it a piece of heaven!
I guess, if you are not ready for an intense citrus explosion, you might even like to reduce the quantity of limes from 5 to 4, accordingly.
5 limes ❂ 100g butter (ghee) ❂ 140g sugar ❂ 1 pack of vanilla sugar ❂ 3 eggs ❂ 200g thick sour cream ❂ 250g all-purpose flour ❂ 1-2 tsp baking powder ❂ ab. 80g pistacchios ❂ powedered sugar (vanilla scented one would be even better) ❂ a pinch of cardamom
1. Preheat oven to 180C.
2. Beat 100g butter (or ghee), 140g sugar and 1 pack of vanilla sugar into thick paste.
3. Add 3 eggs and 200g sour cream, then, 250g flour, a generous pinch of cardamom and 1-2 tsp baking powder. Mix all together very well.
4. Pour the dough onto a baking tray (use parchment paper too). Cut 4 fresh limes (rather small- or middle-sized ones) into round thin slices and lay 'em out on the dough.
5. Bake ab. 20min. Now is the time to make a syrup:
6. Making a syrup: Add one lime grated rind and juice into a water-sugar mix and cook for 3 min.
7. Soak a warm cake with the syrup and sprinkle with chopped pistacchios.
8. Once the cake is cool enough, sprinkle it with confectioners sugar.
I guess, if you are not ready for an intense citrus explosion, you might even like to reduce the quantity of limes from 5 to 4, accordingly.
5 limes ❂ 100g butter (ghee) ❂ 140g sugar ❂ 1 pack of vanilla sugar ❂ 3 eggs ❂ 200g thick sour cream ❂ 250g all-purpose flour ❂ 1-2 tsp baking powder ❂ ab. 80g pistacchios ❂ powedered sugar (vanilla scented one would be even better) ❂ a pinch of cardamom
2. Beat 100g butter (or ghee), 140g sugar and 1 pack of vanilla sugar into thick paste.
3. Add 3 eggs and 200g sour cream, then, 250g flour, a generous pinch of cardamom and 1-2 tsp baking powder. Mix all together very well.
4. Pour the dough onto a baking tray (use parchment paper too). Cut 4 fresh limes (rather small- or middle-sized ones) into round thin slices and lay 'em out on the dough.
5. Bake ab. 20min. Now is the time to make a syrup:
6. Making a syrup: Add one lime grated rind and juice into a water-sugar mix and cook for 3 min.
7. Soak a warm cake with the syrup and sprinkle with chopped pistacchios.
8. Once the cake is cool enough, sprinkle it with confectioners sugar.
Thursday, February 26, 2015
Swedish Flat Cookies
During the New Year holidays, I was experimenting with several sorts of cookies for non-stop feasting, and this recipe has been one of those. Light and crunchy, the cookies were gone in a couple of days! Well, actually, non of my pastries usually last any longer [humble smiley face;], and i've never succeeded yet at holding any of my baked stuff in reserve. Yeah, so many temptations and ... such weak-willed eaters!
Before i give you the recipe, let me show you first my recent gain -- this small chest that came from my friend's family. She is a kind of person who loves everything new only, so she, without any hesitation, allowed me to save life to this respectable long-liver.
Yes, it is more than ... 100 years old, can you imagine?! Though, it has non other special value except its age. I still cannot decide what to keep in there... any ideas?
[recipe credit: Christian Teubner and Annette Wolter's big book of pastry (original German edition: @amazon.co.uk).] 250 g butter ⌘ 120g sugar ⌘ 1 egg ⌘ 400g flour ⌘ 1 tsp baking powder ⌘ 1/2 tsp salt ⌘ 1 egg's white ⌘ 1/4 cup brown coarse-granulated sugar 1/4 cup of cinnamon in powder
Before i give you the recipe, let me show you first my recent gain -- this small chest that came from my friend's family. She is a kind of person who loves everything new only, so she, without any hesitation, allowed me to save life to this respectable long-liver.
Yes, it is more than ... 100 years old, can you imagine?! Though, it has non other special value except its age. I still cannot decide what to keep in there... any ideas?

1. Beat together the egg, butter and sugar until fluffy.
2. Gradually, add sifted flour and baking powder to make dough.
3. Shape the dough into ball and put it in a fridge for ab. 3 hours.
4. Preheat the oven up to 200C. Slice the dough into 3 parts and work with each part individually.
5. Sprinkle the carving board with flour, and roll out every sliced part of the dough into flat sheets to a thickness of 3mm. Cut out small rounds (ab. ⌀6mm) (i used liqueur glass for this purpose).
6. Lay out the cookies onto a baking tray. Slush the cookies with slightly beaten egg yolk, sprinkle with the mixture of brown crystaline sugar and cinnamon.
7. Bake in the middle for 8-10 minutes.
Tuesday, February 17, 2015
Dried Cherries & Spinach Salad
I was naively thinking to surprise you with this unusual salad but... it's already at MARTHA STEWART. In case it still sounds new to you, have a look at my trial and make a bowl for yourself! I've spotted a version with a goat cheese too, so... experiment and enjoy! :)
As the salad is quite hot, and if you have any problems with your stomach or digestive system, you should better refrain from consuming this. If not, you'll experience an interesting taste and energize yourself quickly with vitamins!
Monday, December 15, 2014
Punjabi Kadhi
...another Punjabi wholesomeness for today -- Punjabi kadhi. Kadhi is a spicy thick gravy with addition of besan (chickpea flour) and a sour yoghurt. Pakoras, deep-fried vegetables, are often added as well. It is best enjoyed with chawal (rice), roti (bread) or naan (oven-baked flat bread) and paneer (cottage cheese). Give it a try, you will enjoy! The recipe is from Tarla Dalal's book 'Punjabi Khana'.
❂ 1 1/2 cups fresh dahi (natural yoghurt) ❂ 1 tbsp besan (Bengal gram flour) ❂ 1 tbsp oil ❂ 1 tsp jeera (cumin seeds) ❂ a pinch of hing (asafoetida) ❂ 5 kadi patta (curry leaves) ❂ 1/4 cup sliced onions ❂ 2 cloves garlic, finely chopped ❂ 1/4 tsp haldi (turmeric powder) ❂ salt to taste
1. Whist the dahi and besan in a bowl till smooth. Keep aside.
2. For the tempering, heat the oil in a pan, add the jeera.
3. When they crackle, add the asafoetida, curry leaves, onions and garlic and saute for 5 minutes.
4. Add the curds-besan mixture, turmeric powder, salt and 1 1/2 cups of water*. Simmer on a low flame till the kadhi thickens. Serve hot.
* i added less water than indicated in the recipe, a little less than 200 ml
❂ 1 1/2 cups fresh dahi (natural yoghurt) ❂ 1 tbsp besan (Bengal gram flour) ❂ 1 tbsp oil ❂ 1 tsp jeera (cumin seeds) ❂ a pinch of hing (asafoetida) ❂ 5 kadi patta (curry leaves) ❂ 1/4 cup sliced onions ❂ 2 cloves garlic, finely chopped ❂ 1/4 tsp haldi (turmeric powder) ❂ salt to taste
1. Whist the dahi and besan in a bowl till smooth. Keep aside.
2. For the tempering, heat the oil in a pan, add the jeera.
3. When they crackle, add the asafoetida, curry leaves, onions and garlic and saute for 5 minutes.
4. Add the curds-besan mixture, turmeric powder, salt and 1 1/2 cups of water*. Simmer on a low flame till the kadhi thickens. Serve hot.
* i added less water than indicated in the recipe, a little less than 200 ml
Sunday, December 14, 2014
Lahori Dal
It's time to eat! ;) A very delicious, filling comfort dish -- LAHORI DAL from Tarla Dalal's book Punjabi Khana! You are welcome to try and, no doubt, enjoy wholeheartedly!
1 cup masoor dal (split red lentils) ❂ 1 tbsp garlic paste ❂ 1 tsp chilli powder
❂ 1 tsp turmeric powder ❂ 4 tbsp butter ❂ salt to taste ❂ 1/4 cup cream
❂ 1 tsp cumin seeds (jeera) ❂ 1 cup finely chopped onions (to my taste,
i used half a medium sized onion) ❂ 1 tbsp chopped garlic ❂ 3 tsp lemon juice
❂ 1 tsp black peppercorns

1. Clean, wash and soak the masoor dal in water for 20 min.
2. Drain, add 2 cups of water, add salt and pressure cook for 15-20 min till the dal is cooked.
3. Allow the steam to escape before opening the lid.
4. Whisk till the dal is almost mashed and pour into a deep pan.
5. Add the garlic paste, cilli powder, turmeric powder, 2 tbsp butter and cream. Simmer on a low flame till the dal thickens.
6. For the tempering, heat the remaining butter in another pan, then add the cumin seeds.
7. When they crackle, add the onions and garlic and saute till they become translucent.
8. Add to the dal mixture and simmer for another 5 minutes.
9. Add the lemon juice, peppercorns and salt in required and mix well. Serve hot.
❂ 1 tsp turmeric powder ❂ 4 tbsp butter ❂ salt to taste ❂ 1/4 cup cream
❂ 1 tsp cumin seeds (jeera) ❂ 1 cup finely chopped onions (to my taste,
i used half a medium sized onion) ❂ 1 tbsp chopped garlic ❂ 3 tsp lemon juice
❂ 1 tsp black peppercorns

1. Clean, wash and soak the masoor dal in water for 20 min.
2. Drain, add 2 cups of water, add salt and pressure cook for 15-20 min till the dal is cooked.
3. Allow the steam to escape before opening the lid.
4. Whisk till the dal is almost mashed and pour into a deep pan.
5. Add the garlic paste, cilli powder, turmeric powder, 2 tbsp butter and cream. Simmer on a low flame till the dal thickens.
6. For the tempering, heat the remaining butter in another pan, then add the cumin seeds.
7. When they crackle, add the onions and garlic and saute till they become translucent.
8. Add to the dal mixture and simmer for another 5 minutes.
9. Add the lemon juice, peppercorns and salt in required and mix well. Serve hot.
Sunday, November 30, 2014
'Igaili - Gulf Cuisine:Cardamom-Saffron-Dates Sponge Cake
“If you wait for a cake to be given to you so you will be happy- then
you will be happy when someone gives you a cake. But if you buy a cake
(or bake one) for yourself so you will be happy, you have found the way
of happiness.”
―
C. JoyBell C.
This recipe is from Sarah Al Hammad's book ' Cardamom and Lime. Recipes from the Arabian Gulf'. Really not difficult to make and such a good thing to enjoy - soft textured, cardamom and saffron scented & naturally sweetened with juicy dates -- it was blissful! So, 'let us eat a cake'! ;)
pinch SAFFRON STRANDS ❂ 6-8 SOFT DATES, stoned ❂ 5 EGGS ❂ 150g SUGAR
1 heaped tsp GROUND CARDAMOM ❂ pinch TURMERIC ❂ 120 g plain FLOUR
2 tsp BAKING POWDER ❂ 1 tbsp VEGETABLE OIL ❂ BUTTER for greasing
SESAME SEEDS for sprinkling ❂ handful WALNUTS, chopped
1. Pre-heat the oven to 180C/350F/Gas mark 4. Soak the saffron in 2 tbsp of warm water for about 1 hour, then set aside.
2. Much the dates with a fork then roll small pieces into pea-sized balls. Set them aside. [i tried a faster version of this by just chopping the dates into very small bits]
3. Beat the eggs and sugar together with a mixer for about 10 min., until light and fluffy. Add the cardamom and turmeric.
4. Sift the flour and baking powder [i put a pinch of baking soda] into a bowl and with a wooden spoon, fold 1 tbsp at a time into the eggs. Continue folding as you pour in the saffron water and oil.
5. Grease a cake tin with a butter, dust the bottom and sides with a generous sprinkling of sesame seeds.
6. Pour half the cake mixture into the tin, scatter over the tiny date pieces, then cover with a remaining mixture and a last sprinkling of sesame seeds. Top with chopped walnuts.
7. Bake for 35 min until the cake is golden brown on top (a cocktail stick or a toothpick inserted in the middle should come out clean).
8. Turn out the freshly baked (or cooled) cake upside down on to a plate.
The recipe in the book suggests serving the cake with a spoonful of creme fraiche or a scoop of vanilla ice cream, but we ate it plain, while still hot, with tea, and... yeah, a bliss! :)
Wednesday, October 22, 2014
Delicious Autumn Salad
My previous post was meant to provide you with vitamins for the soul, and now it's time to get some real ones! I'd like to share a super satisfying salad recipe that I invented myself a while ago. I called it Khizaan{urdu} = Autumn salad, as it consists of a few fruits and veggies we may find in abundance this season.
The very first time when I did this, by 'mistake' I put, seemingly, way too much ingredients. Believe me, much more than two persons, even with good appetites, could really finish! ツ So, having glanced at a huge bowl in front of us, we supposed to cope with the half and store the rest up for the next time meal.
But, actually, I can't even say we were eating this salad, -- drinking would be the right word, thus juicy it was! We ate everything and didn't get enough!
BY THE WAY, THIS SALAD CONTRIBUTES TO : beautiful skin and hair /CARROTS/ ; lowering cholesterol level and cleansing of toxins /APPLES/ ; filling your organism with powerful antioxidants /GRAPES/ ; toning up and speeding up metabolism /RUCCOLA/!
* paper background by ENRIQUE FLOURET on FLICKR
The very first time when I did this, by 'mistake' I put, seemingly, way too much ingredients. Believe me, much more than two persons, even with good appetites, could really finish! ツ So, having glanced at a huge bowl in front of us, we supposed to cope with the half and store the rest up for the next time meal.
But, actually, I can't even say we were eating this salad, -- drinking would be the right word, thus juicy it was! We ate everything and didn't get enough!
BY THE WAY, THIS SALAD CONTRIBUTES TO : beautiful skin and hair /CARROTS/ ; lowering cholesterol level and cleansing of toxins /APPLES/ ; filling your organism with powerful antioxidants /GRAPES/ ; toning up and speeding up metabolism /RUCCOLA/!
* paper background by ENRIQUE FLOURET on FLICKR
Friday, September 19, 2014
Carrot Cupcakes
Yum yum! Cupcakes are here, Carrot Cupcakes with Vegan Cream Cheese Frosting!
The recipe has been adapted from "Vegan cupcakes take over the world. 75 dairy-free recipes for cupcakes that rule." by Isa Chandra Moskowitz and Terry Hope Romero. I've started with this quite simple recipe on page 51, and, with such a fantastic start as it has turned out to be, I'm very intrigued to try all other 74 recipes! Ok, now here the heroes of the day are! ;)
*... i used a ready-made pastry dough, light and fluffy, containing all these ingredients (those marked with an asterisk ↑), including even raisins.
** ... i always use ghee for baking instead of butter or margarine (as suggested in this book), -- it's 100% healthy and, as in the case with these little cuppies, I believe it's the ghee that has contributed to an exceptional moisture and tenderness of the dough.
DIRECTIONS:
1. Preheat oven 10 350F (176C). Line muffin tin with 12 cupcake liners.
2. In a medium mixing bowl, mix together sugar, vegetable oil (ghee), yogurt and vanilla. Sift in the dry ingredients (flour, baking soda and baking powder, salt, spices) and mix until smooth. Fold in carrots, raisins and walnuts.
3. Spray the cupcake liners with ghee. Fill the liners 2/3rds full. Bake for 28 minutes until the toothpick inserted through the center of one comes out clean.
4. Once fully cooled, top generously with cream cheese frosting.
VEGAN CREAM CHEESE FROSTING:
- 1/4 cup ghee
1/4 vegan cream cheese, softened
2 cups confectioners sugar
1 tsp vanilla extract
Cream together ghee and cream cheese until just combined. Use a handlheld mixer to whip while adding the confectioners sugar in 1/2 cup batches. Mix until smooth and creamy, then mix in the vanilla. Keep tightly covered and refrigerated until ready to use.
The recipe has been adapted from "Vegan cupcakes take over the world. 75 dairy-free recipes for cupcakes that rule." by Isa Chandra Moskowitz and Terry Hope Romero. I've started with this quite simple recipe on page 51, and, with such a fantastic start as it has turned out to be, I'm very intrigued to try all other 74 recipes! Ok, now here the heroes of the day are! ;)
*... i used a ready-made pastry dough, light and fluffy, containing all these ingredients (those marked with an asterisk ↑), including even raisins.** ... i always use ghee for baking instead of butter or margarine (as suggested in this book), -- it's 100% healthy and, as in the case with these little cuppies, I believe it's the ghee that has contributed to an exceptional moisture and tenderness of the dough.
DIRECTIONS:
1. Preheat oven 10 350F (176C). Line muffin tin with 12 cupcake liners.
2. In a medium mixing bowl, mix together sugar, vegetable oil (ghee), yogurt and vanilla. Sift in the dry ingredients (flour, baking soda and baking powder, salt, spices) and mix until smooth. Fold in carrots, raisins and walnuts.
3. Spray the cupcake liners with ghee. Fill the liners 2/3rds full. Bake for 28 minutes until the toothpick inserted through the center of one comes out clean.
4. Once fully cooled, top generously with cream cheese frosting.
VEGAN CREAM CHEESE FROSTING:
- 1/4 cup ghee
1/4 vegan cream cheese, softened
2 cups confectioners sugar
1 tsp vanilla extract
Cream together ghee and cream cheese until just combined. Use a handlheld mixer to whip while adding the confectioners sugar in 1/2 cup batches. Mix until smooth and creamy, then mix in the vanilla. Keep tightly covered and refrigerated until ready to use.
Thursday, June 12, 2014
Grapes Dessert
This easy and super fast to prepare delicacy is having Azerbaijani roots -- I've spotted the recipe in a Baku magazine.
✎ Just fry in olive oil (i use ghee) the desired quantity of stoneless grapes ( i was lucky to get really big ones!) until they are warm, or slightly cracked and start produce liquid, add some coriander seeds to your taste. Then load this all onto a plate mixed with brinsen cheese cut into cubes and decorate with tarkhun leaves. The dessert is ready!
Thursday, May 15, 2014
Lablab Beans Salad with Asparagus and Chicken Hearts
Now, why not to fortify ourselves with a tasty, delicious and nutritious salad? The recipe I spotted somewhere in a cooking magazine was quite simple, only three ingredients - white beans, asparagus and onion(8/- brrr, for me, a big NO to cooked onion!) Anyway, I got inspired with the idea, and now am ready to present you my own version -- lablab beans, asparagus, zucchini and chicken hearts + some spices, all sprinkled with roasted sesam seeds!
Though it's called a 'salad', but, actually, it is a full-fledged self-sufficient second course dish. Here I give no any exact proportions of ingredients, as I myself did everything by eye. Just mix it all in the desired quantity.1. Soak lablab beans (you may meet also other names of this type of beans as Egyptian or Indian beans) overnight.
2. Cook the beans until soft.
3. Cook chicken hearts.
4. Fry zucchini in olive oil + coriander seeds, ginger powder, white pepper and sea salt.
5. Cook asparaguses for about 10 min or until soft.
6. Roast sesam seeds until crispy and slightly brown.
7. Mix all the ingredients together in a salad bowl. Sprinkle with sesam seeds, add a little bit of olive oil and sea salt if necessary.
Though it's still tasty when cooled down, but, to me, the best way to serve it is when it's very warm, even quite hot [i had mine almost right from the frying pan]. So, if you are like me, then you might like to re-heat it slightly to make it comfortably warm.
Bon Appetit!
Sunday, February 16, 2014
Beze!
... I did it! My first lot of beze or meringue cookies, one of my early childhood most delectable treats, has come out crispy white, not counting a few slightly bronze, and nicely shaped. Though, it took me some time to adjust to right temperature regimes and there was only a teaspoon at my service to help me shape peaks, but everything went much smoother than I had expected!
That's it! As everything has worked out well with the basics, now I'll be testing more beze involving recipes. I have already spotted so many! Meanwhile, bon appetit! ツ
Shown in the photo:
❢ Hand-embroidered tablecloth, bought in Hungary some years ago. ❢ My grandmother's glass carafe and a bowl.
I checked a few magazines and on-line sites for the best beze recipe, but the multiple advices regarding proper temperature, drying time and even right amount of sugar often sounded kinda suspicious. So, I decided to stick to what seemed more reasonable to me.

So, here are the steps I followed: In a mixing bowl (it should be absolutely clean!) beat (on high speed) 3 egg whites gradually adding sugar (100-150g in total amount) until the mixture is thick.
Preheat the oven up to 90C. Lay baking tray with a parchment paper sheet and squeeze beze through the pastry tip. Let beze dry for an 1 1/2 hrs. Then, turn off the oven and leave the cookies inside, with an oven door half-shut, for about 2 hours.That's it! As everything has worked out well with the basics, now I'll be testing more beze involving recipes. I have already spotted so many! Meanwhile, bon appetit! ツ
Shown in the photo:
❢ Hand-embroidered tablecloth, bought in Hungary some years ago. ❢ My grandmother's glass carafe and a bowl.
Thursday, February 6, 2014
Homemade Dark Chocolate Truffles
...about a week ago I managed to get a stupid winter flu and came down with a temperature, dry cough and pleasures like that. Thus, no entertainment for about a whole week. At first I was casting gloomy glances at my laptop (I was strictly prohibited from even thinking to use it) but then, when the temperature fell down I found a very absorbing pastime - leafing through my cookbooks and food mags!
Feasting my eyes on beautiful illustrations I was dreaming about what I would be preparing when I get better. Thus, in one of the mags there was a series of choco recipes (a pic below) and I decided first to try my hands at truffles!
° 50g almond (ground) ° cacao powder
Method of preparation:
Melt 2 bars of chocolate in water bath.
Beat up the cream, mix with melted chocolate and ground almonds.
Wrap the mass in a cling film and put into a plastic container uncovered.
Cool down in a fridge for 1 hour.
Cut the hardened mass into cubes (about 3x3cm) and shape the balls.
Put the balls in a fridge for 10 min.
Melt the 3rd bar in water bath and, with a fork, dip the chocoballs in it.
Lay out the truffles on a foil and refrigerate till the chocolate icing hardens.
Fill a cellophane packet with some cacao powder, put the truffles inside slightly shaking for them to be covered with cacao.
Feasting my eyes on beautiful illustrations I was dreaming about what I would be preparing when I get better. Thus, in one of the mags there was a series of choco recipes (a pic below) and I decided first to try my hands at truffles!
The recipe looked easy and promised to be very tasty too! In spite of my fears like - "...this wouldn't have proper consistence to be shaped into balls..." or " ...what if it wouldn't stiffen?!" - truffles went out just excellent!
Makes about 12 truffles
Ingredients:
Method of preparation:
Melt 2 bars of chocolate in water bath.
Beat up the cream, mix with melted chocolate and ground almonds.
Wrap the mass in a cling film and put into a plastic container uncovered.
Cool down in a fridge for 1 hour.
Cut the hardened mass into cubes (about 3x3cm) and shape the balls.
Put the balls in a fridge for 10 min.
Melt the 3rd bar in water bath and, with a fork, dip the chocoballs in it.
Lay out the truffles on a foil and refrigerate till the chocolate icing hardens.
Fill a cellophane packet with some cacao powder, put the truffles inside slightly shaking for them to be covered with cacao.
Saturday, January 18, 2014
Azerbaijani cuisine: QUBA TIKHMASI
Making it for the first time, I feel even more proud that I could manage these buns so well: crunchy crust, tender inside and wow... not even a slight burning!
Makes about 11 buns
Ingredients:
325g flour ❂ 100g ghee for the dough + 25g ghee for the filling (you can buy ghee or make it yourself, for this please refer to this post) ❂ 100ml milk ❂ 1 egg ❂ 80g sugar (cane sugar would be healthier) ❂ half tsp yeast ❂ half tsp saffron strands ❂ nutmeg and salt to tasteMethod of cooking:
For the filling, mix well flour(65g), sugar(80g) and ghee(25g), add some nutmeg and set aside. You may want to increase a bit the above mentioned quantity to fill all the buns equally generously.
For the dough, pour milk with 100ml of water into a deep saucepan and warm it up a bit.
Then yeast, egg, ghee and salt should be dissolved in warmed milk.
Stirring constantly, pour the flour and mix and work everything into a uniform mass. Leave covered in a warm place for 40 min.
... Roll out the dough to 1,5-2mm thick, make a roll and cut into pieces.
Roll out each piece of dough and put a filling in the midst of it. Now shape buns.
Lay out the buns onto a baking sheet.
Coat each bun with a slightly beaten egg and a saffron infusion* and set aside in a warm place for 20-25 min.
Bake in the oven under 160-180C for 35-40 min.
* infuse a pinch of saffron strands in a necessary amount of warm\hot water and leave for 20-30min.
Thursday, January 16, 2014
INDIAN CUISINE: USLI GHEE (Clarified Butter)
‘Ghee is sweet in taste and cooling in energy, rejuvenating, good for the eyes and vision, enkindles digestion, bestows lustre and beauty, enhances memory and stamina, increases the intellect, promotes longevity, is an aphrodisiac and protects the body from various diseases’ Bhavaprakasha (16th Century Ayurvedic text)
Usli ghee literally meaning 'pure butter' is a basics in Indian cuisine since the Vedic times. It is widely used in Middle-Eastern cooking too. Ghee is a nourishing and very healthy as it doesn't elevate (even lowers!) the cholesterol levels and helps the body to maintain a low state of oxidation.
It can easily be prepared at home by boiling unsalted butter on a slow fire. The heating process removes lactose content and in the outcome, you get a pure 'liquid gold' - a transparent, amber like color ghee possessing wonderful walnut aroma.

There is one more kind of ghee made from mixture of vegetable oils and you can buy it from any Indian grocery or at some on-line shops. It is cheaper but there's no comparison to the real home made ghee! By the way, you can fry in the same ghee for a couple of weeks until it gets burned.
Subscribe to:
Posts (Atom)